


 01
01
 02
03
04
02
02
03
04
02
 01
01
 02
02
 03
03
 04
04
 01
02
01
02
03
01
02
01
02
03
 04
01
02
03
04
01
02
01
02
03
04
01
02
03
04
04
01
02
03
04
01
02
01
02
03
04
01
02
03
04
 01
02
03
04
01
02
03
04
01
02
03
04
01
02
03
04
 01
02
03
04
01
02
03
01
02
03
04
01
02
03
 04
04
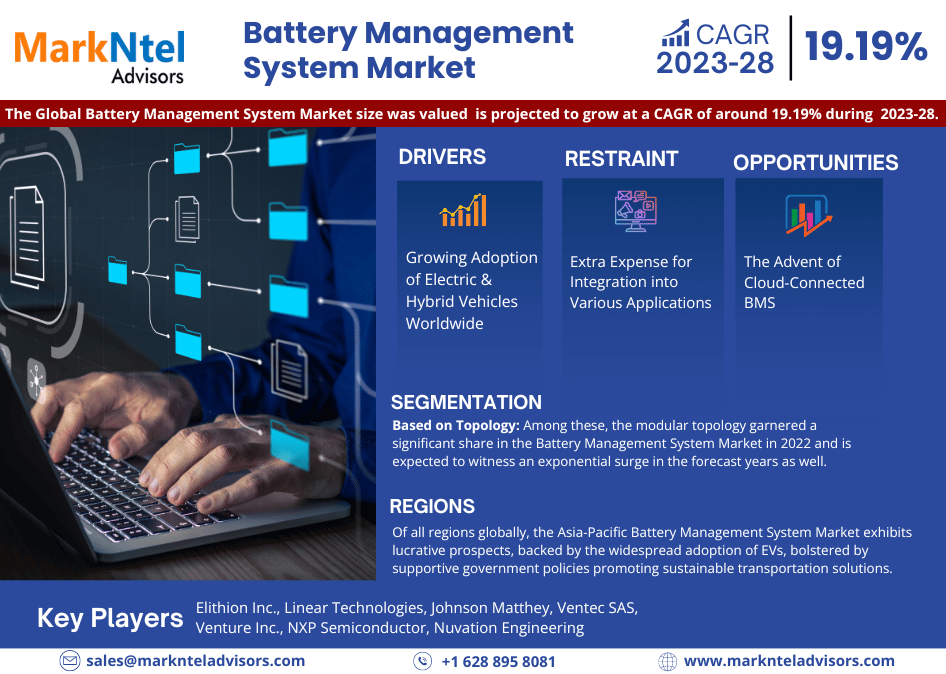
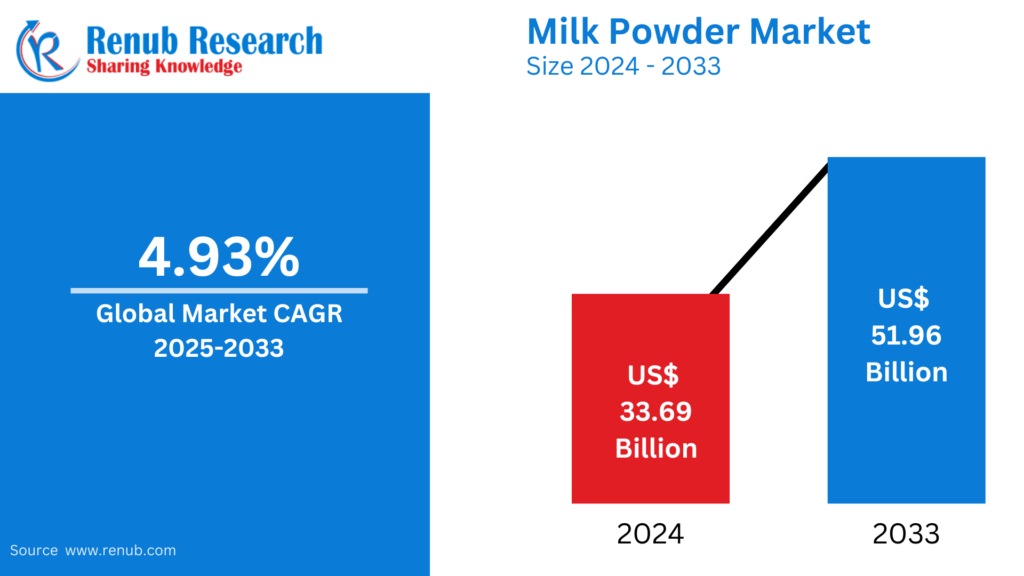
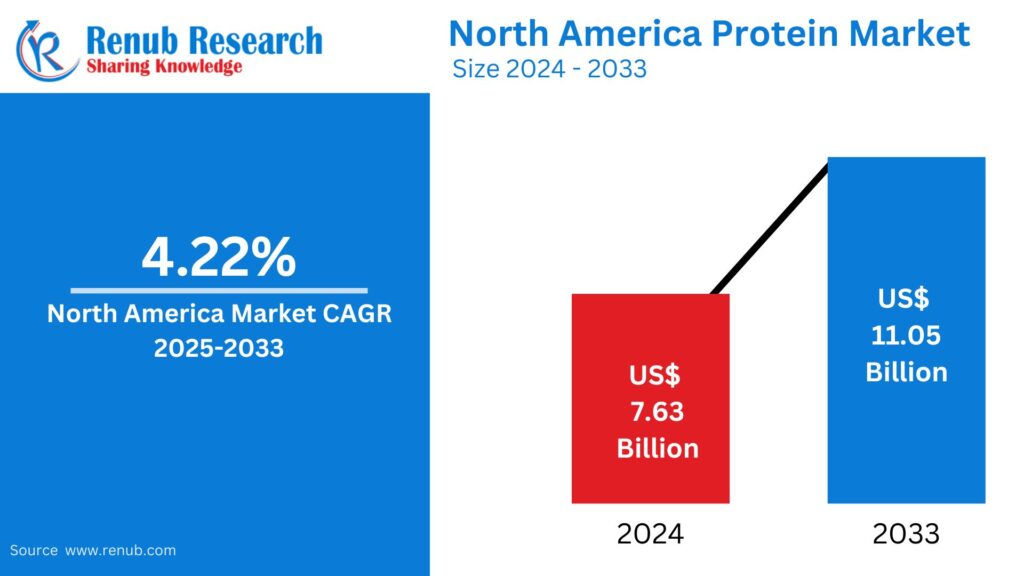
 05
06
01
02
03
04
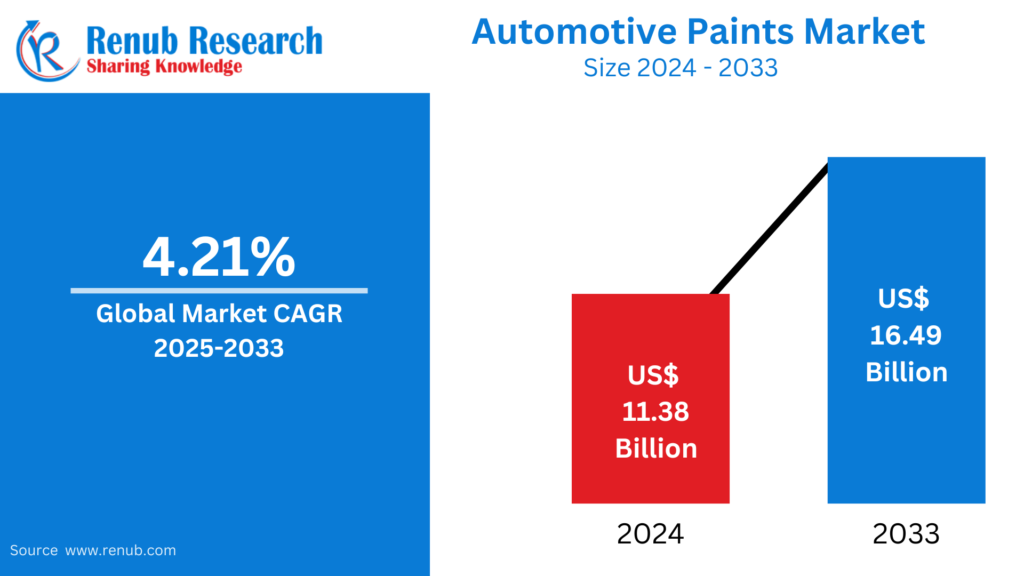
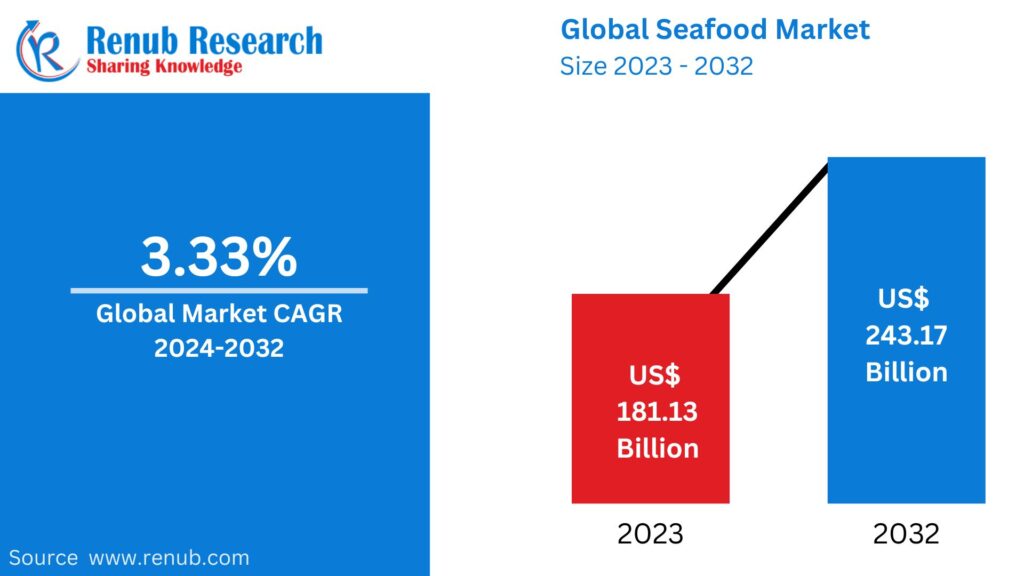
05
05
06
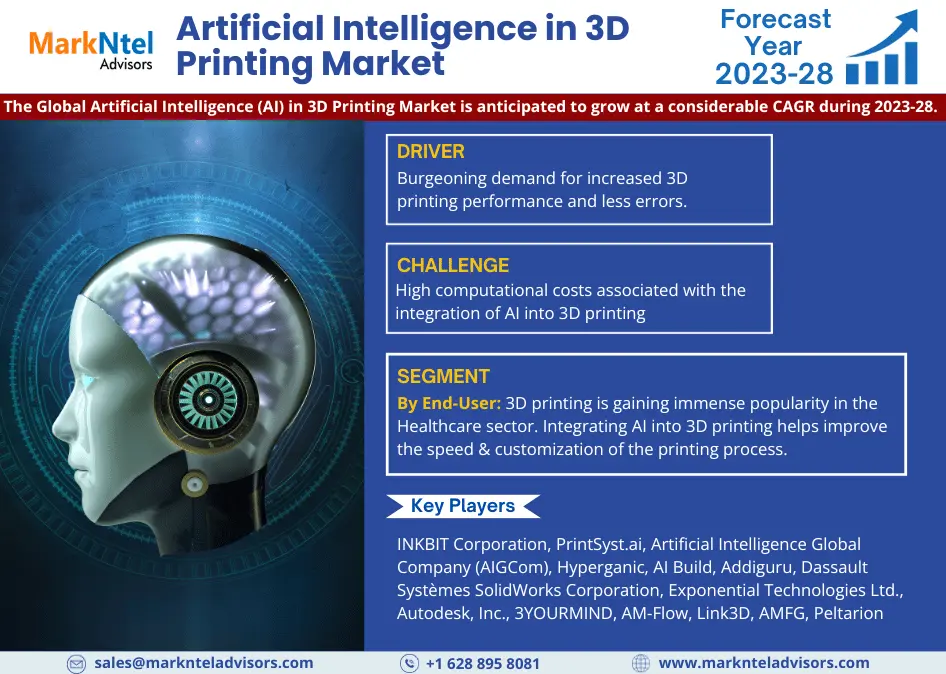
01
02
03
04
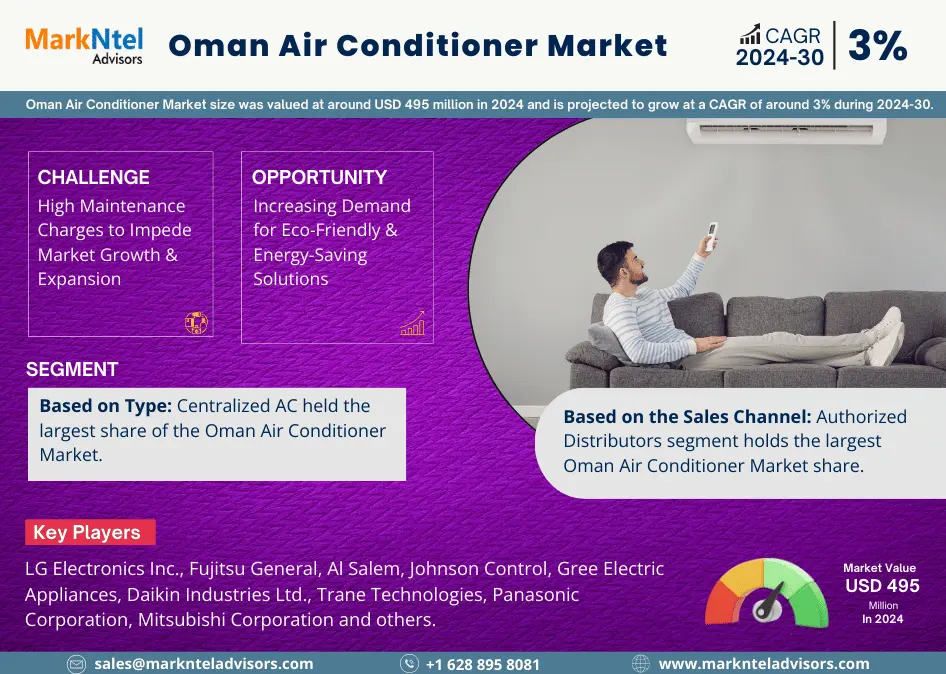
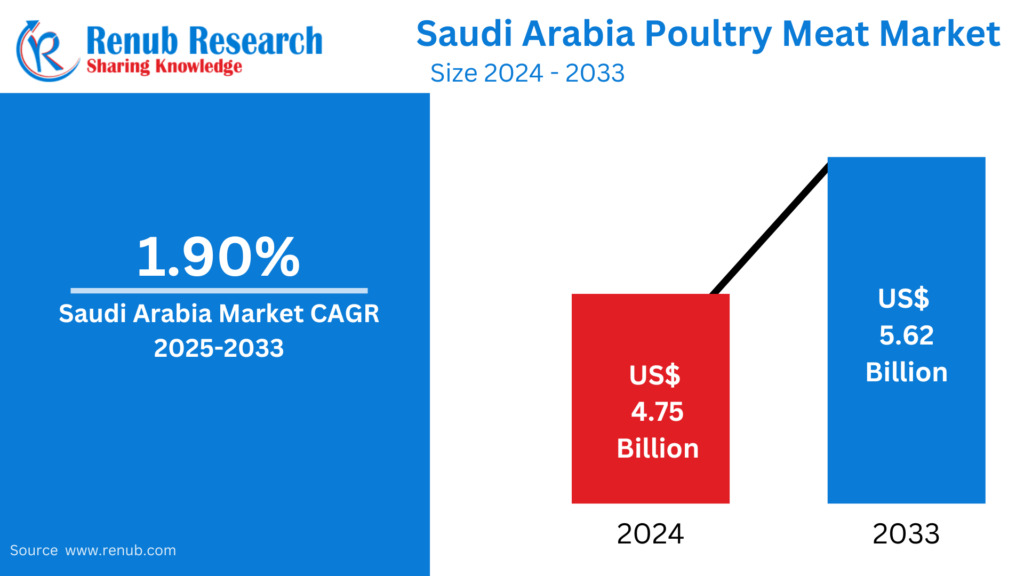
05
 06
01
02
03
04
05
06
06
01
02
03
04
05
06


 01
02
01
02


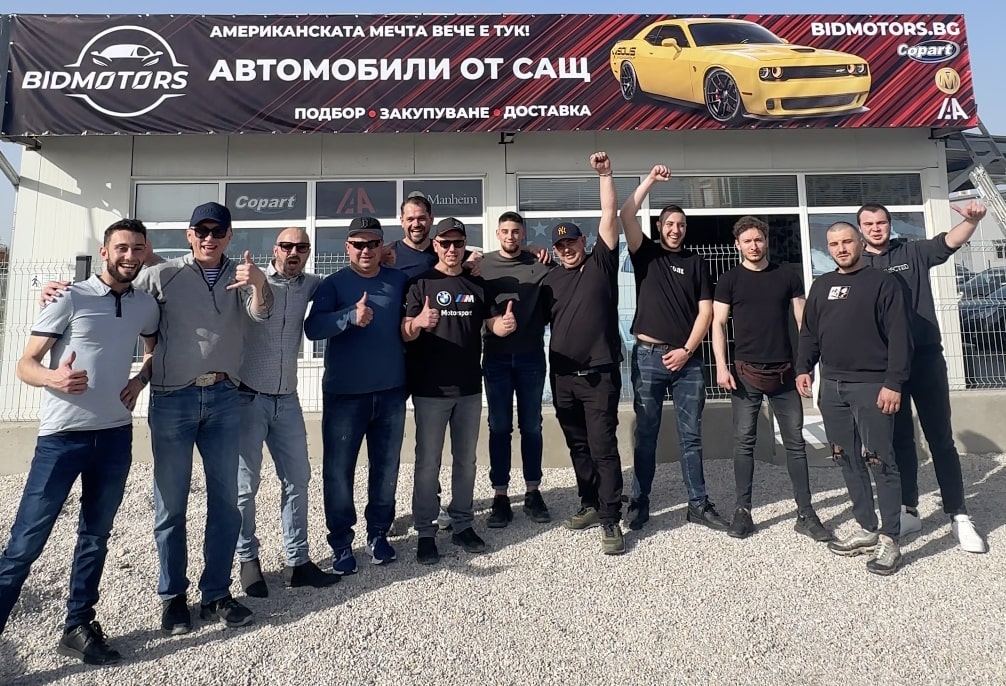
Dubai is a city that thrives on luxury, speed, and innovation — and few car brands embody these traits better
Consistency can make all the difference in colour prediction games. Whether you are just starting or have been playing for
Juggling work, kids’ activities, and social commitments while maintaining a clean home can feel impossible for busy Trophy Club families.
Are you ready to transform your living space into a pristine oasis? In the bustling community of University Park, where
In the bustling community of Trophy Club, maintaining a spotless home can sometimes feel like a daunting task. Whether you’re
Keeping a home neat and tidy in today’s busy world can often feel like an ongoing challenge. Whether juggling work,
If you’ve ever booked a flight, you know the sinking feeling of needing to cancel. Suddenly, the “non-refundable” fine print
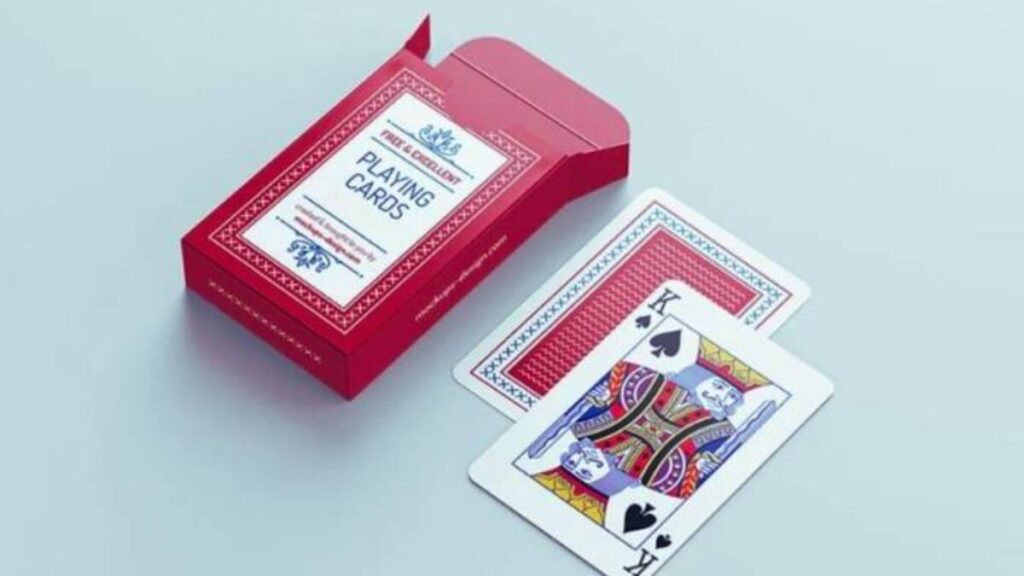
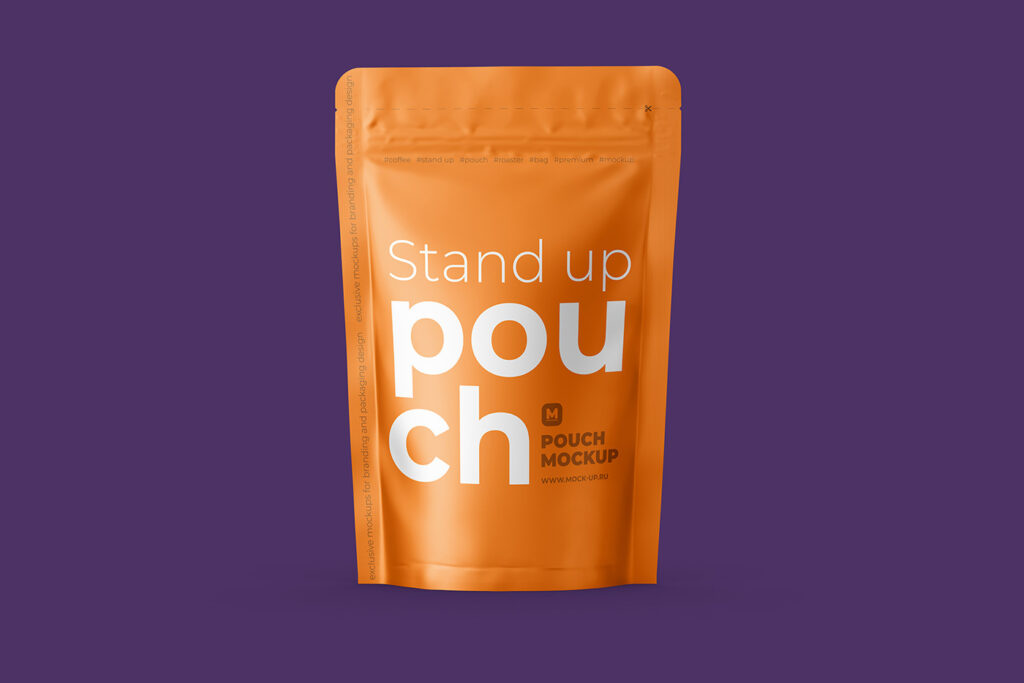
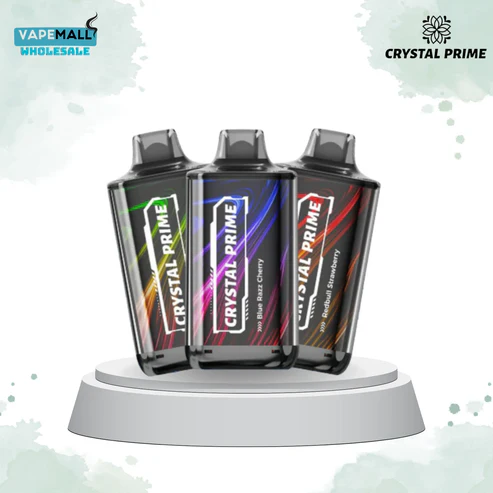
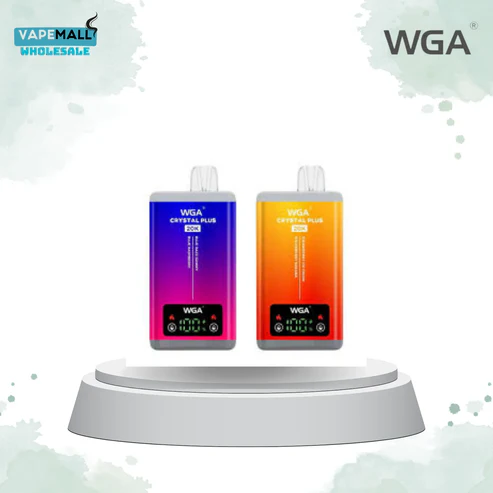
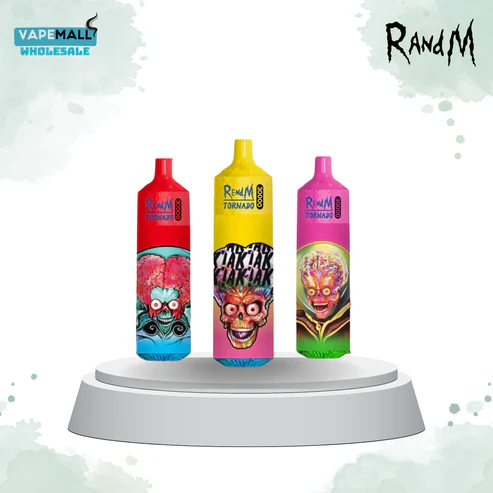
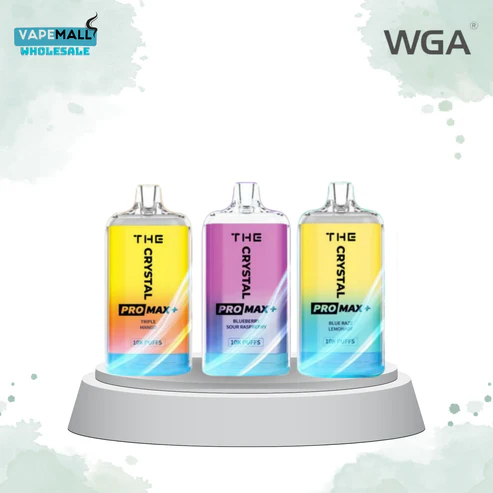
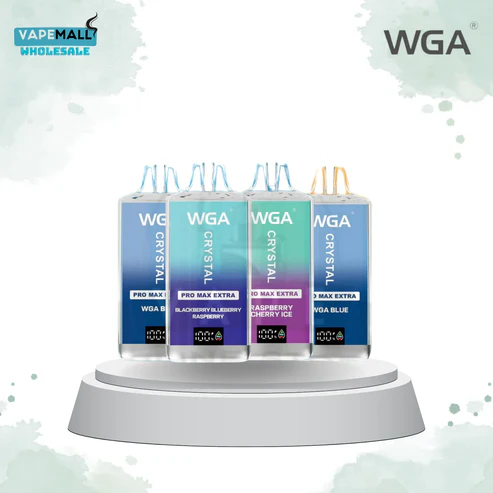
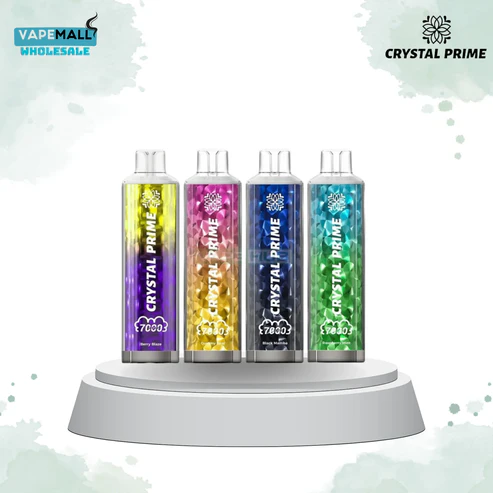
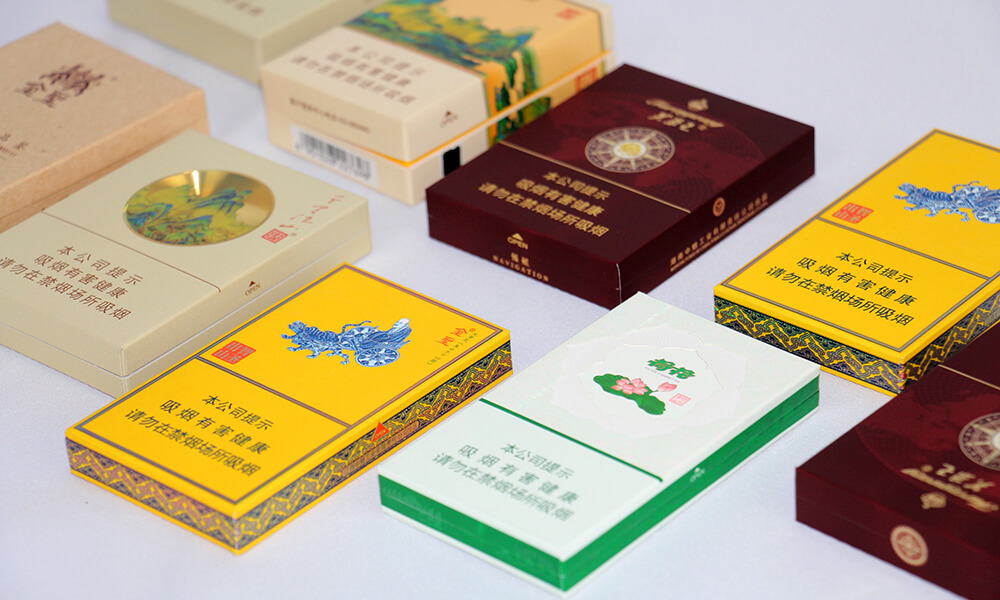
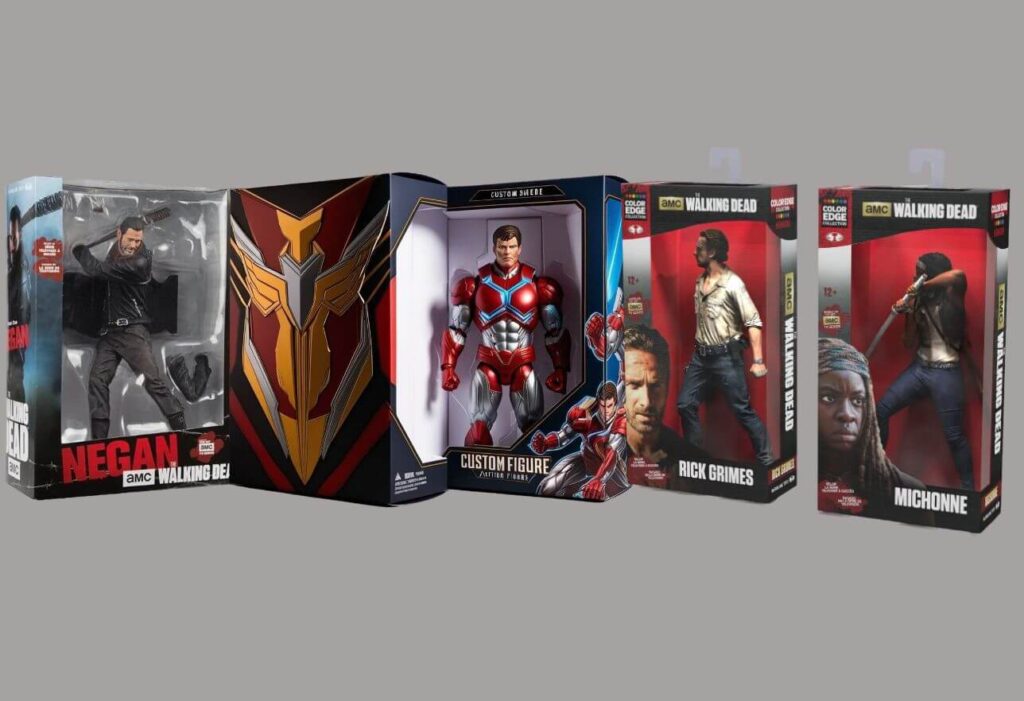
In the world of tobacco and vape products, packaging is more than just a protective layer — it’s a statement
In the gaming industry, no successful title is built in a straight line. A video game development studio understands that
Organizations operate today in a rapidly changing business environment filled with challenges such as technological disruptions, market demand shifts, and
Gemstones have always fascinated humans for their beauty, symbolism, and spiritual powers. Among the many unique crystals, the Cats Eye
6 Club has quickly become one of the most talked-about online games in recent times. Players of all ages are
The light, airy texture of a perfectly baked cake is the result of careful ingredient selection and precise technique. Among
In a rapidly evolving digital world, enterprises must continuously adapt to meet growing customer demands and operational challenges. As technology
Starting from the point of the pencil to the point of the fingertip, technology has transformed the way field service


This may be the latest case of post aggression emigration in Ukraine. But it is unlikely to be the final stage for millions of people to leave the country. These people do not want
 English