


Fancy Letter I Drawing
I is a letter that we utilize a ton in our lives. In addition to the fact that it shows up in many words in the English language but on the other hand is utilized when we are alluding to ourselves! It’s additionally one of the easiest letters to work out of the multitude of letters. At the point when composed, it’s ordinarily pretty much as basic as an upward straight line.
Visit the more kids learning education blog so visit Vocabulary Words.
When composed, there will in some cases be little lines added at the top and lower part of the letter. In this aide, we will be checking out at the letter I in an extraordinary structure. We will figure out how to make an extravagant letter I that you can then tweak with additional subtleties and variety decisions.
Stage 1:
Prior, we referenced how the letter I when composed is only a straight upward line. It would be difficult to make that look especially extravagant, so we will make it a piece fancier. One way that we will do this will be by adding a spiraled subtleties to the plan. We will start with one on the upper left half of the letter.
You could either define this as one persistent boundary, or separate it into two separate lines. The reference picture will give you a decent visual portrayal you can follow, yet you can make it much twister on the off chance that you like! Drawing this sort of winding shape can be very interesting, so you might have to rehearse it a couple of times before it looks as you need it to.
Stage 2:
In this subsequent step, we will draw the left half of the letter. You can begin this step by defining an upward boundary down from the shape that you attracted stage one. This line will be for the most part straight, yet there will be an extremely slight bend to it. That bend will become more honed the lower you go, as it will begin to transform into another winding shape.
This subsequent winding will look basically the same as the primary twisting in shape and size, yet it will be a reflected rendition of the first. Whenever you have drawn it, you will have the whole left half of the drawing. There will be an enormous void space on the right-hand side, however that won’t be the situation for a really long time.
Stage 3:
This third piece of your extravagant letter I will be genuinely straightforward contrasted with the initial steps of the aide. As we referenced in the past step, this one will see us polishing off the diagram for the letter. To do this, we will begin at the highest point of the plan we have up until this point.
We will define an upward boundary down from the highest point of the letter, and it will have a slight bend to it. Close to the top, the line will get genuinely near the line on the left. As you move beyond the midpoint of the letter, it will continuously move out from the middle a piece until it bends down to join the line at the base.
Stage 4:
The framework of this letter is looking great, yet it could look considerably fancier for certain more subtleties! That is the thing we will really do in this step, and it’s a stage where you can carry your own plans to the image. For the present, we will stay with the plan that we picked. We added a subtleties to the letter by utilizing a few wavy, adjusted lines.
This looks truly cool, and it is a straightforward method for making the plan look more complicated. While we like what it looks like, you could utilize some other cool plans all things considered. This is the kind of thing that you could explore different avenues regarding, and there are such countless potential outcomes. You could make the lines straighter, make them structure an alternate example or fill the letter with shapes all things considered.
Stage 5:
It’s nearly time to have a great time shading your drawing, however first we have a couple of additional subtleties to add. Here we give you a few thoughts that leave things open for you to consolidate your own thoughts. You can begin by defining a spiraled boundary jabbing off the highest point of the letter. Then, we decided to add some little leaf shapes around this twisting.
Then, we added a few slender lines around the layout of the letter. We kept these really insignificant, however you could add some more around the layout. At long last, we polished off with a progression of little dabs generally around the letter. We kept them little, however you could switch around the size and situating of these dabs assuming you like. As we referenced, these subtleties are an idea that you can utilize or change as you like. On the off chance that you have different thoughts for outside subtleties, you ought to take the plunge!
Stage 6:
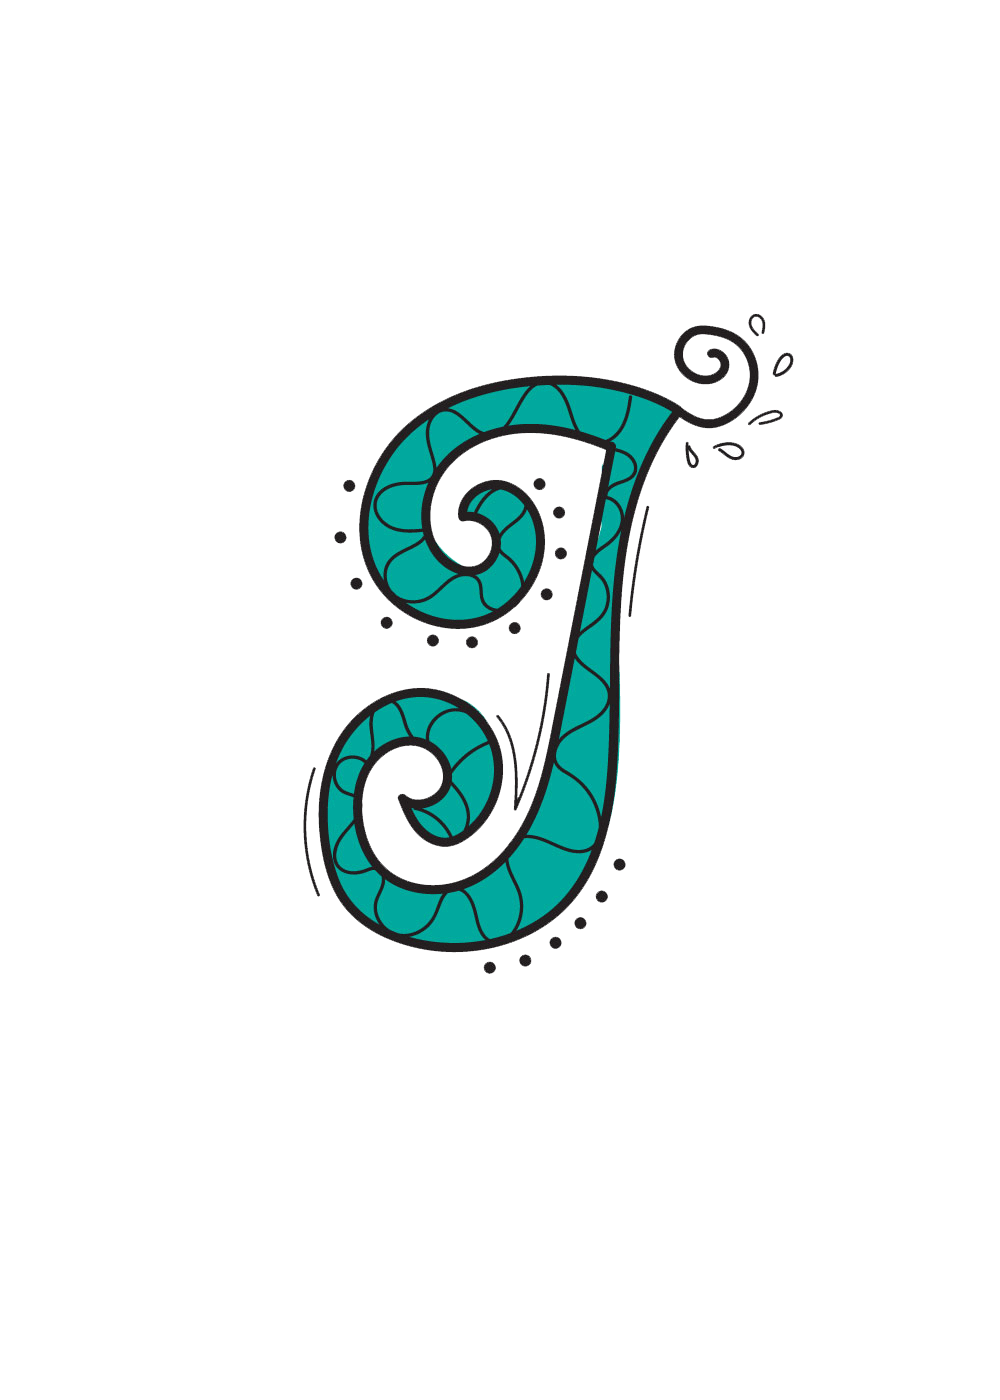
Presently it is the ideal time to polish off the drawing with some shading fun! You can variety your extravagant letter I in any capacity that you like, and there are such countless potential outcomes to attempt. In our reference picture, we flaunt one of the great many ways you could variety the letter. We picked a dull turquoise tone to give the letter a decent rich look.
Note: Learn latest drawing tutorials like Cute ideas drawing blog.
It’s a basic yet successful way to deal with shading the letter, yet you ought to make certain to involve your #1 varieties for the drawing! You could adhere to a solitary tone as we did or utilize loads of various varieties. It would likewise be amusing to utilize different workmanship instruments and mechanisms for the varieties. For example, you could involve a few shaded pens for the lines of the example.
Also, Read our Online tech Learner