


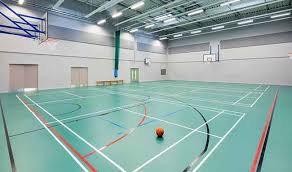
Installing sports club flooring requires careful planning, preparation, and execution to create a safe, durable, and high-performance surface suitable for various athletic activities. Whether you’re setting up a gym, fitness studio, or indoor sports facility, choosing the right flooring material and following proper installation techniques are crucial for the success of your project. Here’s a step-by-step guide on how to install sports club flooring.
Selecting The Right Flooring Material
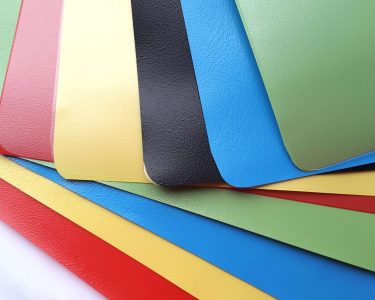
The first step in installing sports club flooring is choosing the appropriate material for your specific needs and requirements. Consider factors such as the type of sports and activities that will take place, the level of impact and shock absorption required, and maintenance considerations. Common options for sports club flooring include rubber, vinyl, hardwood, and synthetic turf. Each material has its advantages and disadvantages, so choose one that best suits the demands of your sports club.
Assessing Subfloor Conditions
Before installation, thoroughly assess the condition of the subfloor to ensure a smooth, level, and stable surface. Remove any existing flooring materials and debris, and inspect the subfloor for cracks, unevenness, or moisture issues. Address any subfloor problems by repairing cracks, leveling uneven areas, and installing moisture barriers if necessary. A properly prepared subfloor is essential for the longevity and performance of your sports club flooring.
Acclimating Flooring Materials
Some flooring materials, such as hardwood and rubber, may need to acclimate to the environment before installation. Follow the manufacturer’s guidelines for acclimation, which typically involves storing the flooring material in the installation area for a specified period to allow it to adjust to temperature and humidity conditions. Acclimating the flooring material helps prevent issues such as warping, buckling, or shrinkage after installation.
Planning The Layout
Before installation, carefully plan the layout of the flooring material to minimize waste and achieve optimal performance. Consider factors such as the size and shape of the sports club space, the direction of the flooring planks or tiles, and any specific design requirements. Use chalk lines or markers to guide the installation process and ensure accurate placement of the flooring material.
Preparing for Installation
Depending on the type of flooring material chosen, installation methods may vary. For rubber or vinyl flooring, you may need adhesive or interlocking tiles for installation. For hardwood flooring, you may need nails, glue, or floating installation methods. Prepare the necessary tools and materials, such as adhesive spreaders, tile spacers, saws, and safety equipment, before starting the installation process.
Installation Process
Follow the manufacturer’s instructions and recommended installation techniques for your chosen sports club flooring material. Begin by laying the flooring material starting from one corner of the room and working your way across. Use spacers or adhesive as needed to ensure proper alignment and levelness. For interlocking tiles, assemble the tiles according to the manufacturer’s guidelines and lock them into place securely. For adhesive-backed flooring materials, apply the adhesive according to the manufacturer’s instructions and press the tiles or planks firmly into place.
Finishing Touches
Once the flooring material is installed, make any necessary adjustments to ensure a seamless and professional finish. Trim excess material along edges and corners, and fill in any gaps or joints with appropriate sealants or grout. Clean the installed flooring thoroughly to remove any adhesive residue or debris, and allow the flooring to set and cure according to the manufacturer’s recommendations.
Professional Assistance
If you’re unsure about how to install sports club flooring or if you’re dealing with complex installation requirements, it’s best to seek professional assistance. Experienced flooring contractors can provide expert advice, precise installation, and quality workmanship to ensure the success of your sports club flooring project. Visit New
Conclusion
installing sports club flooring requires careful planning, preparation, and execution to create a safe, durable, and high-performance surface for athletic activities. By selecting the right flooring material, assessing subfloor conditions, planning the layout, preparing for installation, following proper installation techniques, finishing with care, and seeking professional assistance when needed, you can create a top-notch sports club facility that meets the needs of athletes and enthusiasts alike.